
Modifiers
Modifiers compose primitives into complete shapes. Boolean, mirror, array, sweep, lattice: every one of them runs on the SDF directly, so the result is always a single, watertight surface. No mesh repair, no double-sided faces, no booleans that fall apart at zoom.
Where modifiers live
The Chisel modifier list lives in the Modifier tab of the Properties editor. It replaces Blender’s stock modifier panel while the Chisel engine is active on a Chisel shape (plain meshes keep their normal Blender stack). A big Add Modifier button opens the full menu; the toolbar above the list has Collapse All, Expand All, and an options menu (the three-dot button) with an Expand toggle, Apply All, Delete All and Clean Mods.
Each modifier collapses into a header showing its name and active state. Click the header to expand its options. New modifiers stay collapsed unless you turn on Expand in the toolbar options menu.
The pie menu (Q) and the right-click menu expose the same set: every modifier can be added from either without opening the panel.
Add Modifier and Swap Modifier
The Add Modifier menu lists every modifier in one order, the same order the pie and the right-click menu use:
- Boolean: Difference, Union, Intersect
- Solidify
- Mirror, Bisect, Array
- Emboss, Engrave, Carve
- Twist, Bend, Revolve, Sweep, Lattice
- Smooth
The modifiers that take a target (the three booleans, Emboss, Engrave, Carve) are added to the active object with an empty target field; pick the operand in the panel afterwards. From the pie and right-click menu they act on the selection instead: select the operand shapes, make the host active, click. Everything else (Solidify, Mirror, Bisect, Array, the deformers and Smooth) is added to every selected shape at once.
Hover any add button and its tooltip says what the click will do to the current selection (“Cone: add Mirror across Cube”). When a button is greyed out, the tooltip says why (“Select a Chisel shape first”).
Swap Modifier rewrites the operation of every modifier that targets the selected shapes in one step. Switch a stack of Difference cuts to Union, or turn a boolean into a Carve, without touching the targets one by one. It is the Shift + click action of the pie’s and right-click menu’s boolean buttons. The operation cycle hotkeys ; and ' step the same swap through Difference → Union → Intersect → Emboss → Engrave → Carve (Slice excluded).
Pinned modifiers
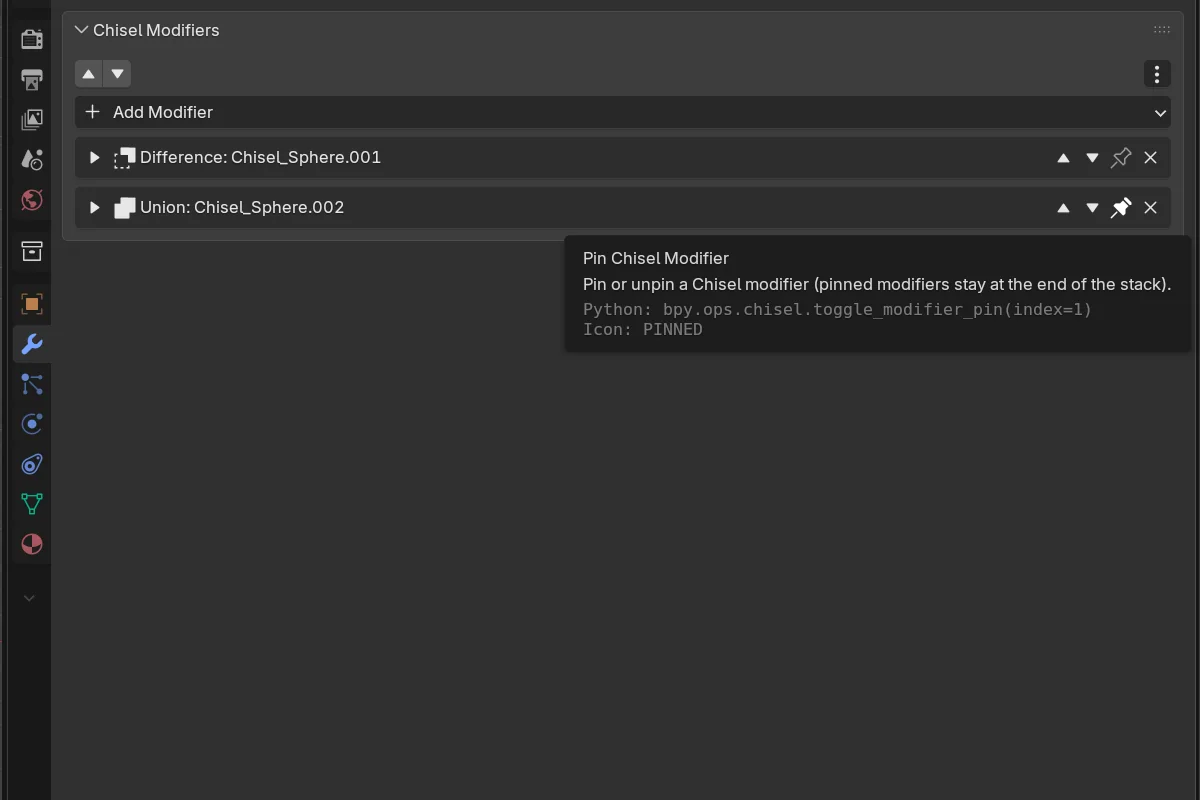
Each modifier row header has a pin toggle (operator tooltip: Pin or unpin a Chisel modifier (pinned modifiers stay at the end of the stack)). A pinned modifier is held at the end (bottom) of the stack, and every newly added modifier inserts above the pins. Unpinning drops the modifier back to the bottom of the non-pinned region. The Move Up / Move Down arrows will not carry a modifier across the pin boundary, so pinned modifiers stay grouped at the bottom.
Pin a Solidify or a final Mirror, for example, and any boolean you add afterward slots in ahead of it, so the shell or the symmetry always applies last. Smooth pins itself when added.
Categories
- Boolean: Difference, Union, Intersect, Slice. With smooth blending.
- Carve: Cut with a grown copy of a live shape.
- Mirror: Reflect across one or more axes with optional smooth seam.
- Bisect: Cut with a plane or a drawn polyline fence, with viewport handles.
- Array: Linear and circular repetition.
- Solidify: Hollow into a shell of given thickness.
- Emboss & Engrave: Push a target shape outward (Emboss) or inward (Engrave).
- Twist & Bend: Deform along an axis.
- Revolve: Spin the profile around an axis.
- Sweep: Run the shape along an editable path of points.
- Lattice: Deform with a cage of draggable points.
- Smooth: One radius for every join in the model.
Apply All
Apply All, in the modifier list’s options menu, bakes the whole chain (the active object plus every operand) into a single mesh-based SDF on the base object and clears its stack. The result is still a live Chisel shape: it keeps rendering, takes new modifiers, and can be converted to a mesh later. See Apply Modifiers.
Modifier UI tips
- Header buttons: each row header has Move Up, Move Down, a pin toggle, and Remove, in that order.
- Quick boolean hotkeys (
Alt + −/=/\\orNumPad −/+//) bypass the panel entirely: select operands, make destination active, tap the key. Ctrl + Dduplicates a shape together with its modifier graph. Children, boolean and displace targets, carve targets, bisect plane objects and curve sources come along, and any external boolean that referenced the original picks up the copy too (group cuts stay group cuts). Each copy owns its own mesh data, so deleting a duplicate never touches the original.- Adjust modal:
Bopens Adjust Rounding on a primitive;Ctrl+Bopens it on the active boolean or carve modifier. While active, keys1–5switch profiles instantly:1Round,2Sharp,3Soft,4Tight,5Chamfer;Stoggles between the radius and the Chamfer Smooth value.Spaceconfirms whereverEnterdoes. - Origins: a shape’s origin is where its modifiers pivot (mirror plane, array anchor, twist / bend / revolve axis).
Set Originand Affect Only Origins move it without moving the geometry, on chain bases, Ngons and prisms too; add Affect Only Parents to keep parented cutters in place. - Red rows: a modifier whose target was deleted shows as “(no target)” in red. Clean Mods removes all of them from the selection in one click; see Clean.